Avoid Common Mistakes When Repairing Your Baseboard Yourself

Get professional-looking results by avoiding these common DIY baseboard repair errors
Bricklayer
Bricklayer
5 min
Planning to fix your baseboards on your own? Learn how to steer clear of the most frequent mistakes that can ruin your project. With the right preparation, materials, and finishing touches, you can achieve a smooth, durable, and polished result.
Amelia Ortiz
Amelia
Ortiz

Avoid Common Mistakes When Repairing Your Baseboard Yourself

Get professional-looking results by avoiding these common DIY baseboard repair errors
Bricklayer
Bricklayer
5 min
Planning to fix your baseboards on your own? Learn how to steer clear of the most frequent mistakes that can ruin your project. With the right preparation, materials, and finishing touches, you can achieve a smooth, durable, and polished result.
Amelia Ortiz
Amelia
Ortiz

Baseboards may seem like a small detail, but they play an important role in protecting your walls from scuffs, sealing gaps, and giving your home a finished look. Over time, they can get damaged by moisture, vacuum cleaners, or everyday wear and tear. If you’re planning to repair your baseboards yourself, it’s a great DIY project—but only if you avoid some common pitfalls. Here’s how to get it right the first time.

Understand What Baseboards Do Before You Start

Baseboards cover the joint between the wall and the floor, hiding uneven edges and helping to keep out dust and drafts. They also take a lot of abuse from mops, furniture, and pets. When repairing or replacing them, it’s important to understand their function so you can choose the right materials and methods.

If your baseboards are made of wood, MDF, or PVC, each material behaves differently. Wood can warp or crack if exposed to moisture, MDF swells when wet, and PVC can expand or contract with temperature changes. Knowing what you’re working with helps you plan a repair that lasts.

Mistake 1: Skipping the Prep Work

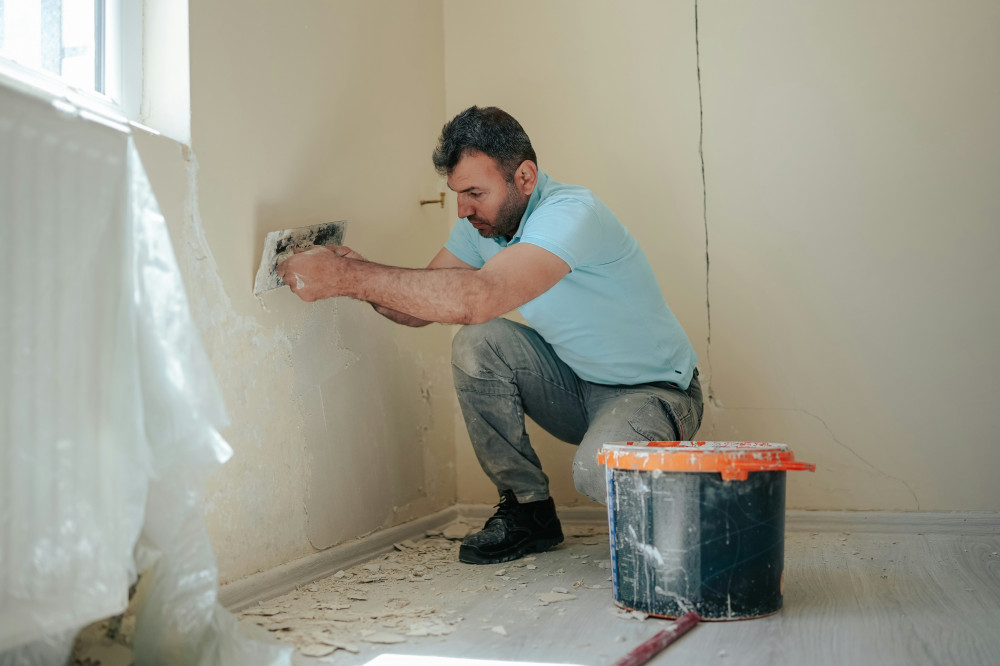
A successful repair starts with proper preparation. Many DIYers try to patch or paint over dirty or damaged surfaces, which leads to poor adhesion and uneven results. Before you begin, remove any old caulk, nails, or loose paint. Clean the area thoroughly with a mild detergent and let it dry completely.

If you’re replacing a section, measure carefully and cut the new piece to fit snugly. Use a miter saw for clean corners, and always test-fit before nailing anything in place.

Mistake 2: Using the Wrong Materials

Not all baseboards—or adhesives—are created equal. Using the wrong type of caulk, filler, or paint can cause problems down the road. For example, latex caulk is flexible and paintable, making it ideal for sealing gaps between the wall and baseboard. Silicone caulk, on the other hand, doesn’t take paint well and is better suited for bathrooms or other high-moisture areas.

When filling nail holes or dents, use a wood filler for wood baseboards and a lightweight spackle for MDF or PVC. After it dries, sand it smooth before painting.

Mistake 3: Ignoring Moisture Issues

If your baseboards are warping, cracking, or showing signs of mold, the problem might not be the baseboard itself—it could be moisture. Check for leaks, condensation, or gaps that let water in. Simply replacing the baseboard without fixing the underlying issue will only lead to more damage later.

In bathrooms, kitchens, or basements, consider using moisture-resistant materials like PVC or composite baseboards. They’re more durable in damp environments and easier to maintain.

Mistake 4: Poor Cutting and Fitting

Uneven cuts and gaps at corners are among the most common DIY mistakes. Inside and outside corners require precise miter cuts—usually at 45 degrees—to fit neatly together. If your walls aren’t perfectly square (and most aren’t), you may need to adjust the angle slightly for a tight fit.

Use a coping saw for inside corners if you want a professional finish. It takes a bit more time but results in cleaner joints that won’t open up as the wood expands or contracts.

Mistake 5: Rushing the Painting

Painting baseboards can make or break the final look. Many people rush this step or skip proper priming. Always sand lightly before painting, wipe away dust, and apply a primer if you’re painting bare wood or MDF. Use a high-quality trim paint with a semi-gloss or satin finish—it’s easier to clean and more resistant to scuffs.

Let each coat dry fully before applying the next, and use painter’s tape to protect your walls and floors. Patience here pays off with a smooth, professional-looking result.

Mistake 6: Forgetting the Finishing Touches

Once your baseboards are installed and painted, don’t forget to caulk the top edge where it meets the wall. This small step gives a seamless look and helps keep out dust and drafts. Use a thin, even bead of paintable caulk and smooth it with a damp finger or caulking tool.

Finally, inspect your work for any missed spots or uneven paint. Touch up as needed before putting furniture back in place.

Get a Lasting, Professional Result

Repairing or replacing baseboards yourself is a manageable project that can make a big difference in your home’s appearance. The key is to take your time, use the right materials, and pay attention to detail. With careful preparation and a steady hand, you’ll end up with baseboards that look great and stand up to everyday life for years to come.

How to choose the right type of home for your family
Are you considering changing your home type? This e-book examines the advantages and disadvantages of different types of housing, from townhouses to apartments, so that you can more easily find the type of housing that suits your familys needs and lifestyle.
Download e-book
The Importance of Brick: How Brick Type Affects Cavity Wall Properties
Discover how the choice of brick can transform the performance and durability of your cavity walls
Bricklayer
Bricklayer
Brick
Construction
Architecture
Building Materials
Home Design
5 min
The type of brick you select does more than define your building’s look—it influences insulation, moisture control, and long-term strength. Learn how different brick types affect cavity wall properties and what to consider when choosing the right material for your next project.
Ariana Bradley
Ariana
Bradley
Insulate Floors Above Unheated Spaces – Easily and Without Major Work
Keep your home warmer and more energy-efficient with simple floor insulation solutions
Bricklayer
Bricklayer
Home Improvement
Insulation
Energy Efficiency
DIY
Comfort
4 min
Discover how to insulate floors above unheated spaces like basements, crawl spaces, or garages—without tearing up your flooring. Learn practical methods, cost considerations, and tips for moisture control to make your home more comfortable year-round.
Piper Foster
Piper
Foster
Exterior Paint: The Most Common Types and Their Characteristics
Discover which exterior paint best protects and beautifies your home
Bricklayer
Bricklayer
Exterior Paint
Home Improvement
House Painting
DIY
Exterior Design
7 min
Choosing the right exterior paint is about more than just color. Learn about the most common types of exterior paint, their unique characteristics, and how to select the best option for your home’s surface and climate.
Lucas Young
Lucas
Young
Facade cleaning as an effective solution to moisture and poor ventilation
Protect your home’s structure and indoor air quality with proper facade maintenance
Bricklayer
Bricklayer
Facade Cleaning
Home Maintenance
Moisture Control
Ventilation
Healthy Living
4 min
Moisture and poor ventilation often start outside the home. Learn how regular facade cleaning can prevent mold, improve air circulation, and extend the life of your property—making it both a practical and health-conscious investment.
Jack Brooks
Jack
Brooks
Avoid Common Mistakes When Repairing Your Baseboard Yourself
Get professional-looking results by avoiding these common DIY baseboard repair errors
Bricklayer
Bricklayer
DIY
Home Improvement
Baseboard Repair
Interior Design
Renovation
5 min
Planning to fix your baseboards on your own? Learn how to steer clear of the most frequent mistakes that can ruin your project. With the right preparation, materials, and finishing touches, you can achieve a smooth, durable, and polished result.
Amelia Ortiz
Amelia
Ortiz
When Technology Meets Aesthetics: The Changing Modern Home Style
Discover how technology and design merge to redefine the modern living space
Trends
Trends
Smart Home
Interior Design
Modern Living
Home Technology
Sustainable Design
3 min
From smart lighting to sustainable materials, technology is reshaping the way we live and decorate. Explore how innovation and aesthetics come together to create homes that are both functional and beautiful.
Ariana Bradley
Ariana
Bradley
Mindful Decorating with Plants – Create Calm and Presence in Your Home
Bring harmony and mindfulness into your home with the natural beauty of plants
Trends
Trends
Mindful Living
Home Decor
Indoor Plants
Wellness
Interior Design
7 min
Discover how thoughtful plant placement and care can transform your home into a peaceful retreat. Learn how to decorate mindfully with greenery to create balance, presence, and a deeper connection to nature.
Piper Foster
Piper
Foster
Transform Your Space with Simple Renovation Ideas
Refresh your home with easy updates that make a big difference
Trends
Trends
Home Renovation
Interior Design
DIY
Home Improvement
Decorating Ideas
3 min
Discover how small, budget-friendly renovation ideas can completely transform your home. From color and lighting to surfaces and details, learn simple ways to create a space that feels new, functional, and uniquely yours.
Lucas Young
Lucas
Young
How to Create a Functional Home After the Kids Have Moved Out
Redefine your living space and make your home truly yours again
Trends
Trends
Home Design
Empty Nest
Interior Inspiration
Decluttering
Lifestyle
5 min
When the kids have moved out, your home enters a new phase—full of space, opportunity, and potential. Discover how to transform empty rooms, declutter with purpose, and design a flexible, comfortable home that reflects your lifestyle today.
Jack Brooks
Jack
Brooks